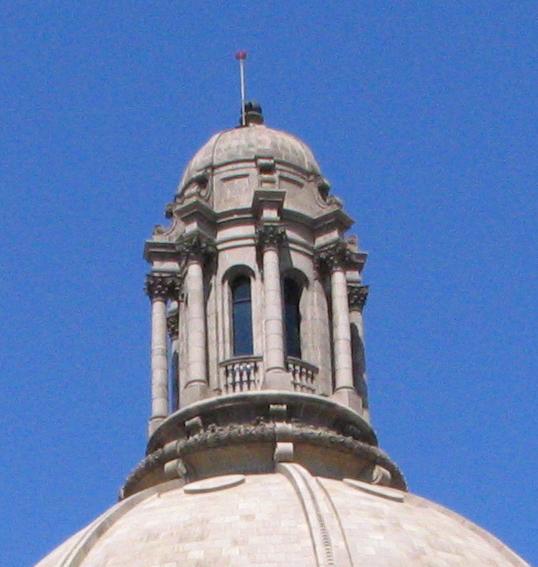
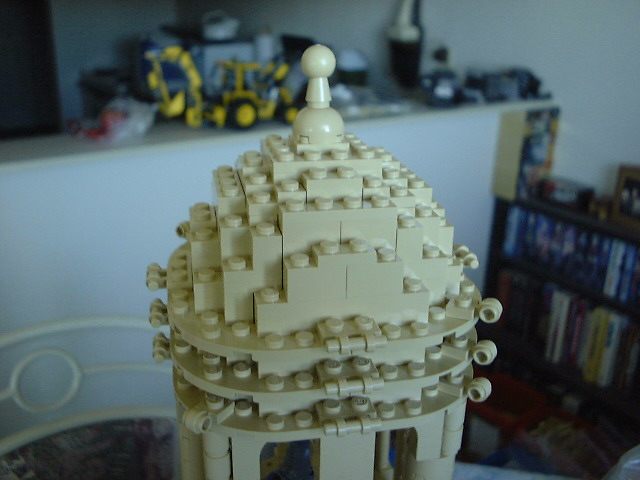
Here we see the real thing versus the Lego model. In this photo of the real thing, it looks like the sloped roof decorations should be dark grey and the curved decorations higher up should be black. So, I built them that way. Other pictures, including a postcard with an ariel photo, along with live views, later convinced us that those decorations really should be tan. So, that's what they are now. Once the parts had arrived, it took about 20 minutes to redo each of the 8 sections. We did not attempt to model the circular patterns on the upper part of the dome. After all of this was done, we learned that those decorative parts were actually black in the past - the black was removed as part of a major cleaning of the building.
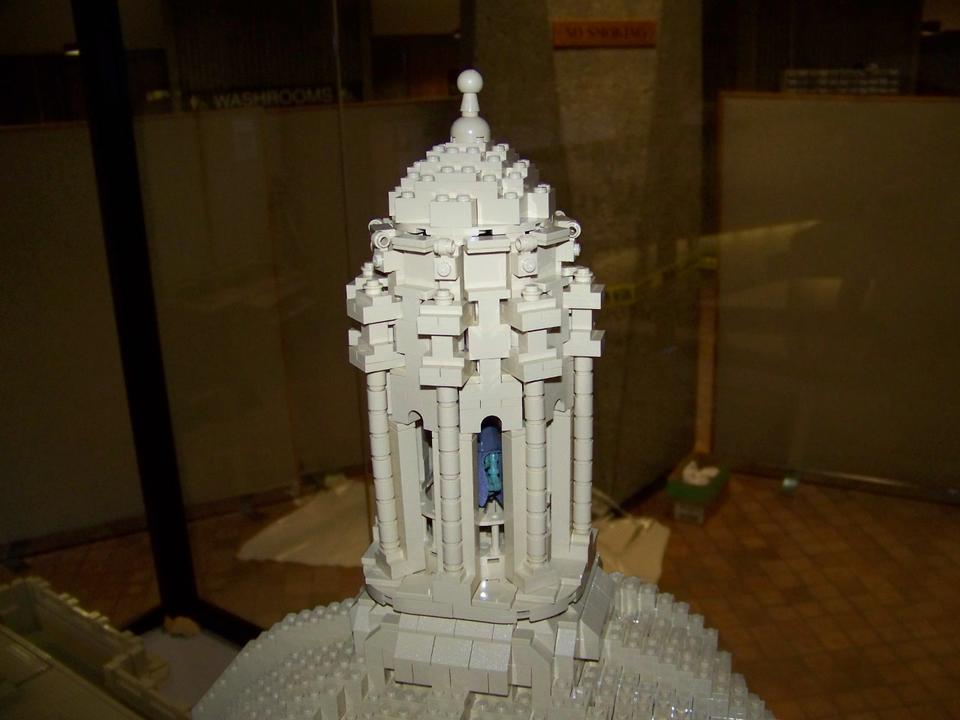
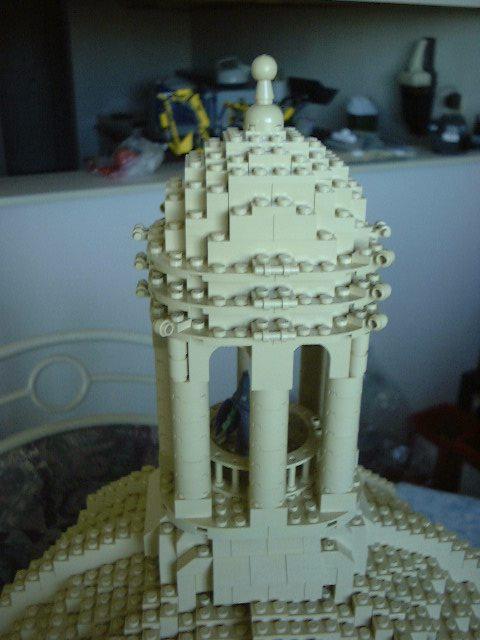
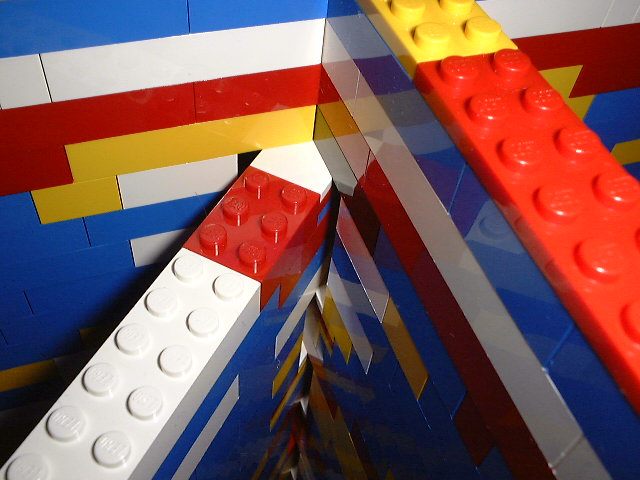
The basic construction of this part of the whole model starts with eight trapezoidal sections at the bottom (with the railing sections). Note the half-stud offsets on their front face. Above that is the main cylinder, which we have modelled as eight straight sections. Building these sections as straight walls, rather than attempting curved walls, let us do better detailing. Between the 8 sections, and nicely hiding the gaps, are 8 buttresses, which are connected to the 8 wall sections using brick hinges (a total of 48 in the entire structure). There is a black-walled open space behind each window, so that the various colours used internally don't show through. The upper dome was constructed based on a computer program written by a friend, as was the small dome on top of the bell tower.
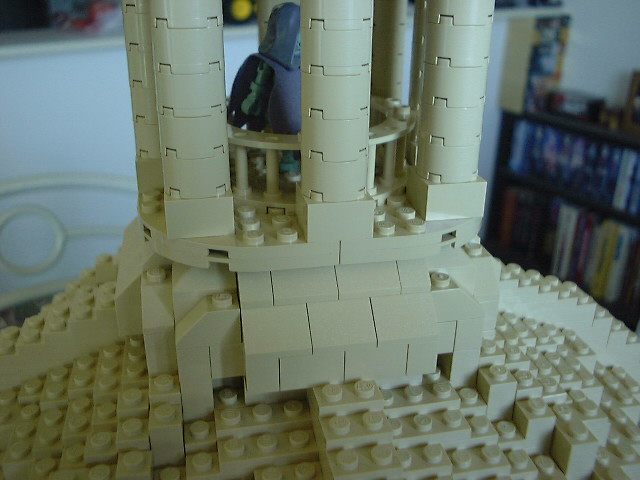
We don't have any good pictures of the bell tower - you would need a helicopter to take any! The circular railing is there, and the number of pillars is correct. The real bell tower appears to have glass between the pillars. The pillars themselves are not round, but are shaped into at least two levels, and are a bit like gothic arches. We don't know what is at the top of the open space. As of a couple of years ago there was a speaker system that was used for playing carillons, and I believe there were real bells before that. The ball on top might be bronze or iron, but we don't think black would look right for the Lego model.
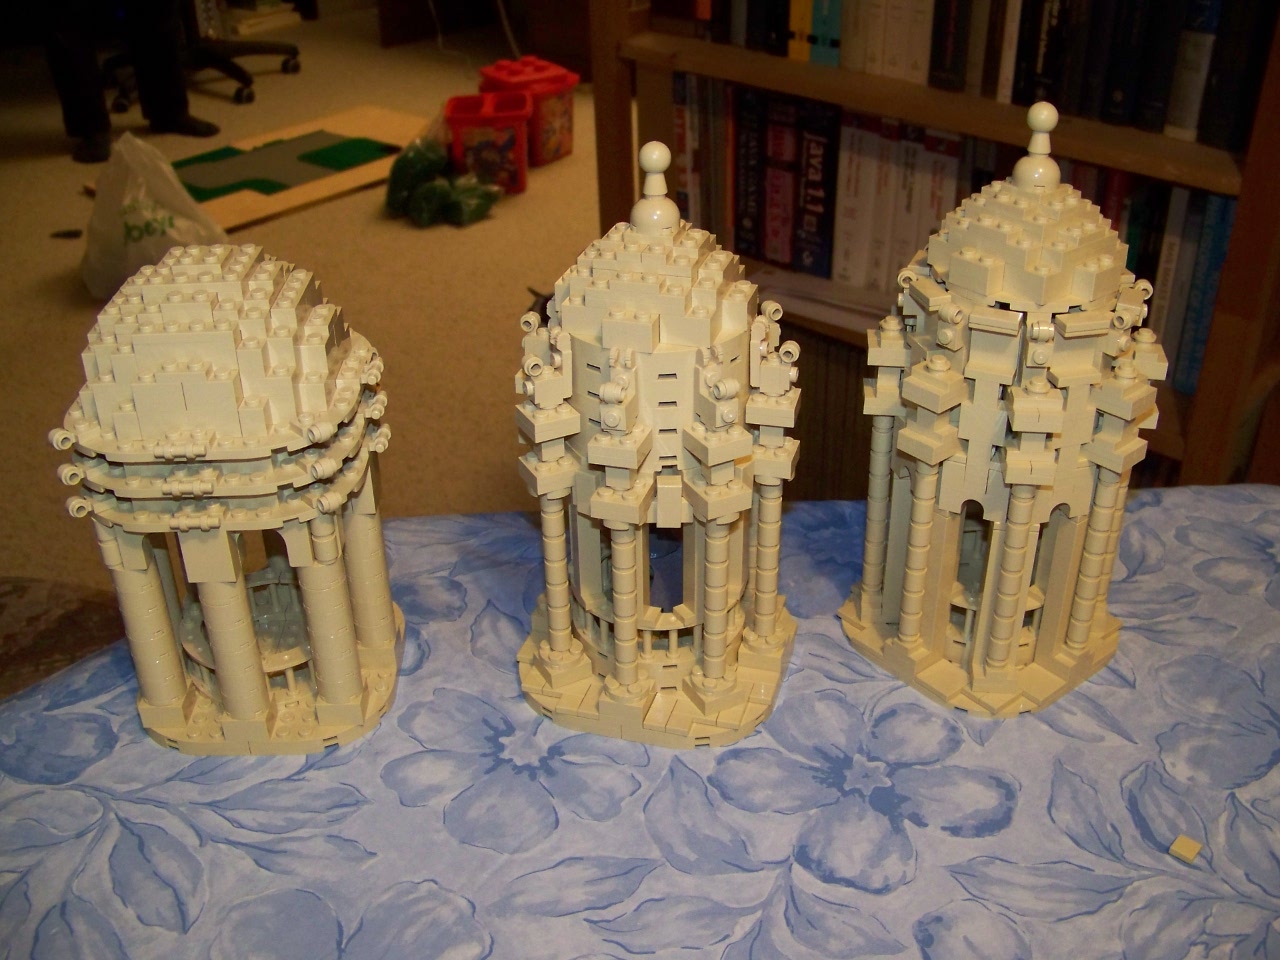
A couple of years later, John had access to the roof of the real Legislature. He took a better picture of the bell tower then. When the model was to be moved into the annex of the real building, we decided to improve on the bell tower. There were two new versions built, and NALUG members voted on which one they liked best. The winner was put on the model before it was assembled in the display case.
|
|
|
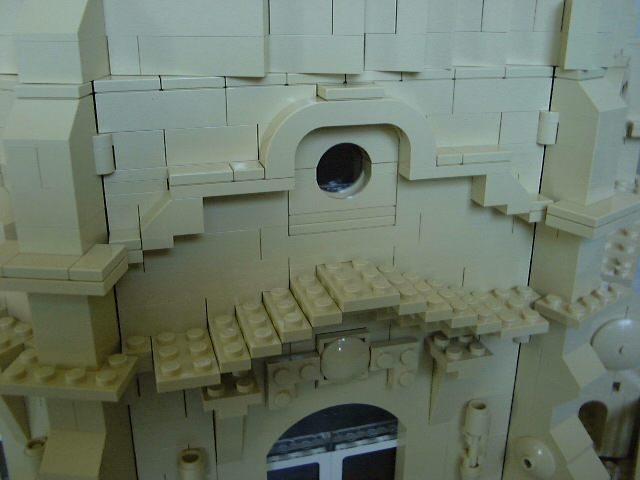
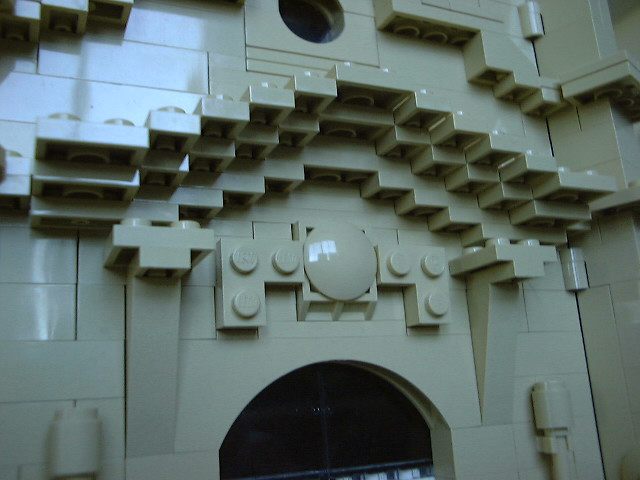
We couldn't get the framing of the windows quite right, but we've done the best we can. The curved decoration above the round window should be round, centered on the round window (which should be a bit bigger). It should also curve the same in its downward half. We thought about mounting arches upside down there, but that wouldn't help them go across the angles, and they need to go around the buttress as well.
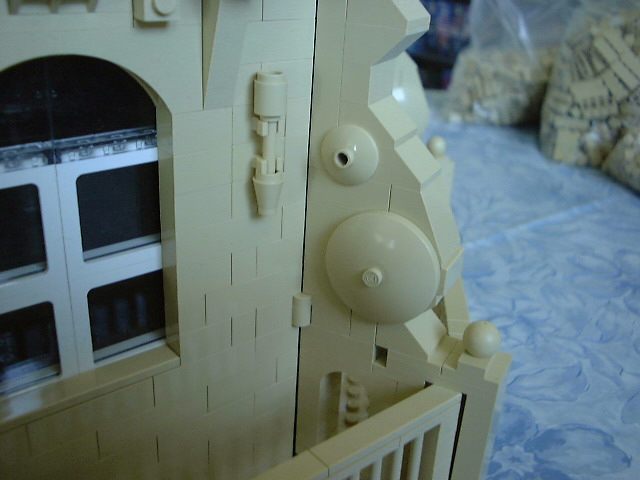
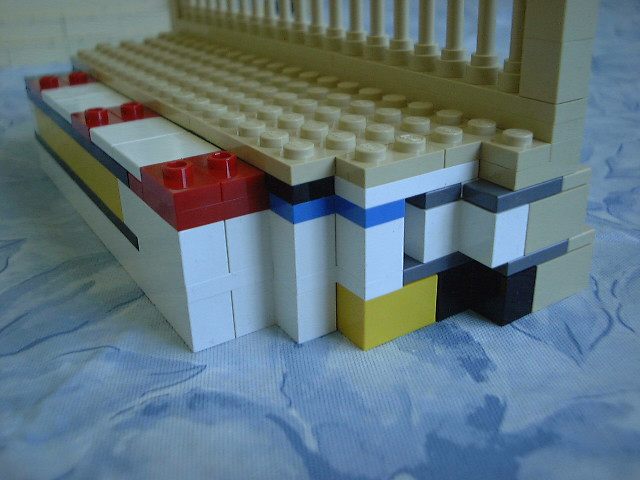
The small flat roof sections are on top of a tan jumper plate, with the round hole on the bottom of the 2x2 plate fitting onto the stud of the jumper plate. The round item in the center under the roofs is a 2x2 bottom round piece, mounted sidewise on a braced angle bracket. The L plates are mounted SNOT (Studs Not On Top) at their bottom stud, on a 1x1 plate on the front of a headlight brick. Originally they were one stud lower down, and thus in front of the arch, but they were later moved up to align better with the "globe" that they are supposed to be holding onto.
The buttresses, as mentioned above, are connected to the wall sections using brick hinges. The shape and decorations on them are what we could achieve using Lego pieces. The small 2x2 radar dishes shouldn't be there - they should instead be centered in the small protrusion above them. But, we couldn't think of a way to do that, and the general agreement was that the buttresses look better with the small dishes present.
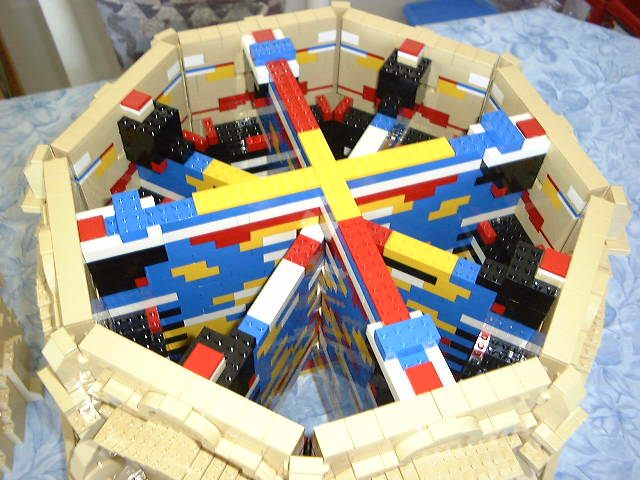
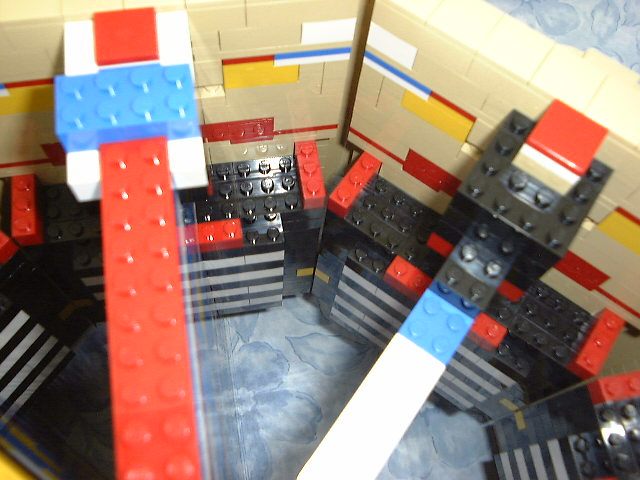

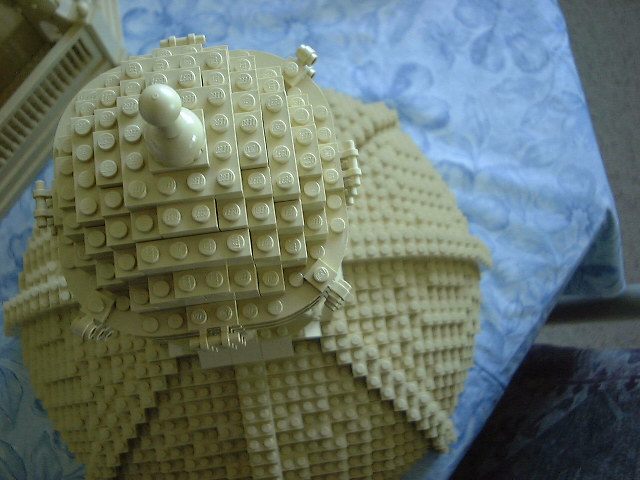
The cylinder has 8-way symmetry. To make the whole unit solid, all 8 walls are connected via a strong 8-way cross. The cross joins in the middle using some 2x2 tile and 2x2 "spinner" plates. The higher part of the cross, with the strengthening plate on top, is how the cylinder is picked up - the bottom trapezoidal sections are not solidly enough attached to be used.
The dome has random coloured interior supporting bricks, but you may note that it was built with symmetric colouring. Doing that (which was also done for the 8 wall sections and the 8 trapezoidal base sections) makes construction easier, especially when modifications are necessary. The 1x1 bricks on top are our method of getting everything right. We use one ring to show the spaces where the next level should not be present. An inner ring shows where the level above that will disappear, so that we know where we need tan bricks whose tops will be visible. Actually, it is best to go even further in with tan, so that we don't get other colours showing in the gaps between bricks.
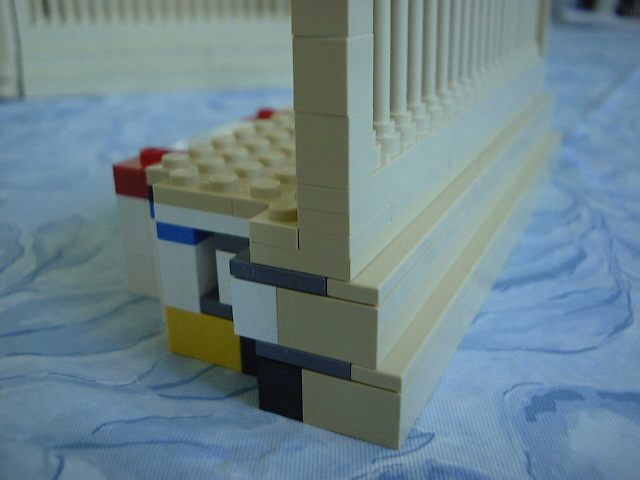
The trapezoidal lower bases fit onto the bottoms of the wall sections. They are at a half-stud offset, which lets them fit together quite nicely, and to leave not much of a crack between them and the buttresses (after the 8 outer columns are added). The front faces of the trapezoids step down at half-stud offsets. That was done using non-tan jumper plates in the interior.